Cart is empty.
.png)


Denkovi Relay Command Line Tool is software for controlling all Denkovi USB relay boards from command line promt
Brief description
The main goal of this project is to help to all our customers to use our USB relay boards easily and without any programming knowledge. This tool is actually shell for all our USB relay boards and it does not matter which is the relay board, the command is the same. Just type one command and the the tool will set, get relay status or even will take temperature value from the board sensor (if any). It can be integrated in other software and you don't need to know much about how the USB relay board work. With this tool it is like a "game" and it takes literaly minutes to create for example PHP script and control the USB relay board from smartphone browser.
Features
- Multiplatform: supported by Windows and Linux and macOS;
- Simple and user friendly commands - list, read/write relays and i/o status, timers;
- Practically supports unlimited number of relay boards connected to the host computer;
- Typical applications for this software are:
- Create desktop icons to turn particular relays;
- Create BAT/BASH files to make more complex logic (like timers for example);
- The commands can be executed from PHP script;
- Control our USB relay boards from Android / iPhone mobile devices;
- The USB relays can be controlled from each software/platform which can run external executable files or commands in command line promt.
Important!
WARNING: It is not allowed to use this software with relay boards which are not manufactured by Denkovi Assembly Electronics LTD! If you want to support us, you are welcome to order our products!
List with currently supported Denkovi relay boards
|
Order number
|
Relay board name and link
|
| DAE-CB/Ro4/MCP2200-USB | USB Four(4) Relay Output Module,Board for Home Automation v2 |
| DAE-CB/Ro4-USB | USB Four Channel Relay Board for Automation |
| DAE-CB/Ro8/12V-USB | USB Eight Channel Relay Board for Automation |
| DAE-CB/Ro4-JQC/TCN75A-USB | USB Four Channel Relay Board with temperature sensor TCN75A |
| DAE-PB-RO16-12V-WIFI-PCB | WiFi 16 Relay Module, TCP/IP, UDP, Virtual Serial Port - PCB |
| DAE-PB-RO16-12V-WIFI-BOX | WiFi 16 Relay Module, TCP/IP, UDP, Virtual Serial Port - DIN BOX |
| DAE-IB/Di8-USB | USB 8 Opto-Isolated Digital Inputs Module |
Tested with the following OS
- Windows - 7 and above
- Linux - Ubuntu, openSUSE, CentOS
- Raspbian - Strech or Buster (Raspberry PI 3 and above)
- macOS - Catalina
System requirements
- Java - the recommended is Oracale Java 8 Java SE Runtime Environment (JRE) / Java SE Development Kit (JDK), but other JRE / JDK builds and versions (8 or above) also should work;
- For some Denkovi modules - additional drivers must be installed (for example FTDI VCP or Microchip drivers). Please refer to their documentation for more information or download the full software packages.
Installation and running
The first step must be done is to download the appropriate archive file.
|
Version
|
Release date
|
Download files
|
| 2.15 | 09.03.2022 |
Version history may be downloaded from here
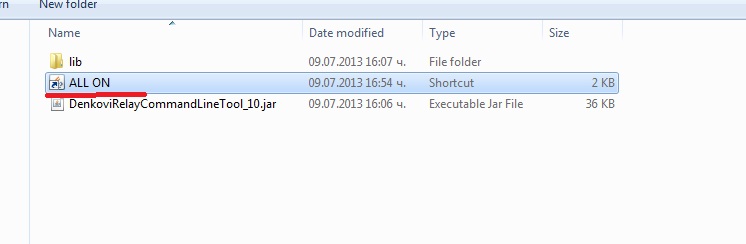
Next, we need to extract the archive. We should see the below files:
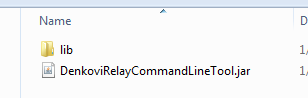
WARNING: Please note that when moving of the tool is required, it is neccessary to move the lib folder together with the jar filel. A vital libraries are inside and without them, the tool wont work.
The next step is to check if we have Oracle Java 1.8. Open the cmd.exe or the terminal and write the following command:
java -version
For Oraclae Java you should get similar message like below:
java version "1.8.0_241"
Java(TM) SE Runtime Environment (build 1.8.0_241-b07)
Java HotSpot(TM) 64-Bit Server VM (build 25.241-b07, mixed mode)
Java(TM) SE Runtime Environment (build 1.8.0_241-b07)
Java HotSpot(TM) 64-Bit Server VM (build 25.241-b07, mixed mode)
If Java version is different than 1.8 or it is not installed, it is recommend to update/install it. For the various OS, the steps for installing/updating java are different - they can be found on Google or Orcale web site.
Finally, we run the tool. Without any parameters, it simple prints help instructions and shows usage information:
java -jar DenkoviRelayCommandLineTool.jar
If we get something like this, then it is OK:
Usage:
info | --info | -i : Software information
examples | --examples | -e : Print examples
help | --help | -h | /? : Print this help
list: List current devices. Since ver.2.6 there are two lists - one for FTDI and one for MCP devices.
[Device Serial Number or ID or IP:Port] [Relay Count {4|8|16|4v2|wifi16-tcp|wifi16-udp}] [Relay X|all] [On/Off {0|1}]: Turn on or off relay X on device with specified Serial Number or ID
[Device Serial Number or ID or IP:Port] [Relay Count {4|8|16|4v2|wifi16-tcp|wifi16-udp}] [Relay X|all] [status]: Return 1 for working relay and 0 for stopped relay.
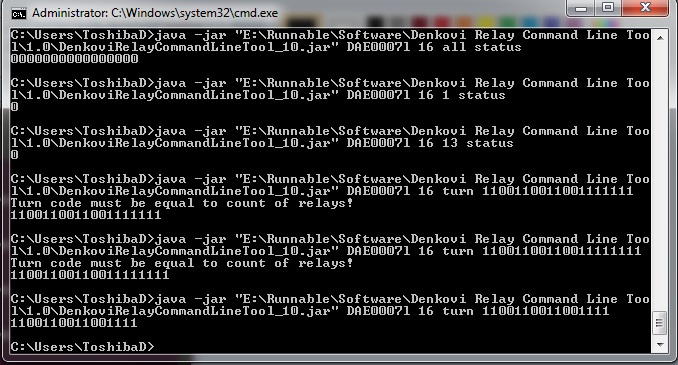
[Device Serial Number or ID or IP:Port] [Relay Count {4|8|16|4v2|wifi16-tcp|wifi16-udp}] Turn [(0|1)^N]: Set status for all N relays where N is the count of relays.
[Device Serial Number or ID or IP:Port] [Relay Count {4|8|16|4v2|wifi16-tcp|wifi16-udp}] temp [C|F]: Get temperature in C or F.
[Device Serial Number or ID or IP:Port] [Relay Count {4|8|16|4v2|wifi16-tcp|wifi16-udp}] timer [M,(0|1)^N,T1,(0|1)^N,T2...]: Executes timer/pulses where M is the number of iterations (cycles), N is the count of relays, T1 is the time in miliseconds for the first state, T2 for second state....
info | --info | -i : Software information
examples | --examples | -e : Print examples
help | --help | -h | /? : Print this help
list: List current devices. Since ver.2.6 there are two lists - one for FTDI and one for MCP devices.
[Device Serial Number or ID or IP:Port] [Relay Count {4|8|16|4v2|wifi16-tcp|wifi16-udp}] [Relay X|all] [On/Off {0|1}]: Turn on or off relay X on device with specified Serial Number or ID
[Device Serial Number or ID or IP:Port] [Relay Count {4|8|16|4v2|wifi16-tcp|wifi16-udp}] [Relay X|all] [status]: Return 1 for working relay and 0 for stopped relay.
[Device Serial Number or ID or IP:Port] [Relay Count {4|8|16|4v2|wifi16-tcp|wifi16-udp}] Turn [(0|1)^N]: Set status for all N relays where N is the count of relays.
[Device Serial Number or ID or IP:Port] [Relay Count {4|8|16|4v2|wifi16-tcp|wifi16-udp}] temp [C|F]: Get temperature in C or F.
[Device Serial Number or ID or IP:Port] [Relay Count {4|8|16|4v2|wifi16-tcp|wifi16-udp}] timer [M,(0|1)^N,T1,(0|1)^N,T2...]: Executes timer/pulses where M is the number of iterations (cycles), N is the count of relays, T1 is the time in miliseconds for the first state, T2 for second state....
If you are behind proxy or firewall, you can use the following format of the java command. It is possible the proxy server and port to be different for your case:
java -Dhttp.proxyHost=proxy.server.com -Dhttp.proxyPort=8000 -jar "path/to/the/folder/of/this/tool/"DenkoviRelayCommandLineTool.jar
Please note: For Linux/Raspbian, it may be neccessary to run with sudo. In order to avoid that, you may follow our tutorial DAE-AN012: Accessing USB Relay Boards without Sudo in Linux
Commands
LIST command
This command lists all the supported USB devices connected to computer currently.
java -jar DenkoviRelayCommandLineTool.jar list
Serial number [Description] [ID]
FTDI devices:
DAE06Llh [FT245R USB FIFO] [id=0]
DAE05Lld [FT232R USB UART] [id=1]
MCP devices:
0001478552 [MCP2200 USB Serial Port Emulator Microchip Technology Inc.] [id=0]
0001478551 [MCP2200 USB Serial Port Emulator Microchip Technology Inc.] [id=1]
FTDI devices:
DAE06Llh [FT245R USB FIFO] [id=0]
DAE05Lld [FT232R USB UART] [id=1]
MCP devices:
0001478552 [MCP2200 USB Serial Port Emulator Microchip Technology Inc.] [id=0]
0001478551 [MCP2200 USB Serial Port Emulator Microchip Technology Inc.] [id=1]
For Linux/Raspbian,when we work with FTDI devices and make LIST, we may see the following (empty device):
Serial number [Description] [ID]
FTDI devices:
[ ] [id=0]
DAE05Lld [FT232R USB UART] [id=1]
MCP devices:
FTDI devices:
[ ] [id=0]
DAE05Lld [FT232R USB UART] [id=1]
MCP devices:
This usualy means that we have to execute the following two commands every time when we plug the device to the USB port:
rmmod ftdi_sio
rmmod usbserial
rmmod usbserial
and then make the LIST command.
Regarding the MCP devices (USB 4 Relay v2) the LIST command supports several more additional modifications. Each variant uses different HID library for better OS compability. The reason is there is not well working HID library for all known OS. We've tried to chose the correct default library according to the OS, but the user can always do that in the described way below. For all LIST command variants, execute the following command:
java -jar DenkoviRelayCommandLineTool.jar list-?
and you will get all the implemented HID libraries at that moment:
list-purejavahidapi
list-hid4java
list-hidapi
list-hid4java
list-hidapi
Now we can work with the desired library, or example:
java -jar DenkoviRelayCommandLineTool.jar list-hidapi
Device descriptions
Since the LIST command returns array of devices as well as their factory descriptions, depending on the description value, we may distinguish the following relations:
- FT245R USB FIFO - this is either USB 4 Relay v1 either USB 8 Relay either USB 4 Relay with TCN75 sensor. All of them use the same chipset - FT245RL;
- FT232 USB UART - this is USB 16 Relay (uses FT232RL);
- MCP2200 USB Serial Port Emulator Microchip Technology Inc. - this is USB 4 Relay v2 (MCP2200);
Addressing (identifying) devices
Open by serial number
USB relay boards can be accessed by their serial number, retrieved by the LIST command.
java -jar DenkoviRelayCommandLineTool.jar DAE06Llh 4 all status
Open by ID
They can be accessed also by their ID. This is the number under the device is listed (lexicographicly) in the system at the moment along with the other devices from the same type. This can be also retrieved by the LIST command.
java -jar DenkoviRelayCommandLineTool.jar ID=2 4v2 all status
Open by IP:Port
This type of addressing is only for the Wi-Fi 16 Relay Boards
java -jar DenkoviRelayCommandLineTool.jar 192.168.1.1:8899 wifi16-tcp all status
Device types
The following device types are accepted by the tool. The below types define how the hardware to be initiated and configured by the software:
- 4 - for device USB 4 Relay v1
- 4r4io_abcd - for device USB 4 Relay v1 but working with the four additional i/o lines. abcd define the i/o direction for In1, In2, In3, In4 (FT245R IO.0, IO2, IO4, IO6); 0 is input, 1 is output. Examples: 4r4io_1111, 4r4io_0000, 4r4io_1100...
- 4v2 - for MCP based device USB 4 Relay v2
- 4v2-library - the same like the above command but with expressly stated HID library, for example 4v2-hidapi, 4v2-purejavahidapi, 4v2-hid4java;
- 4r4iov2_abcd - for MCP device USB 4 Relay v2 but working with the four additional i/o lines. abcd define the i/o direction for In1, In2, In3, In4 (MCP2200 GP4, GP5, GP6, GP7); 0 is input, 1 is output. Examples: 4r4iov2_1111, 4r4iov2_0000, 4r4iov2_1100...;
- 4r4iov2_abcd-library - the same like the above command, but with expressly stated HID library, for example 4r4iov2_1111-hidapi, 4r4iov2_0000-purejavahidapi, 4r4iov2_1100-hid4java;
- 8 - for device USB 8 Relay
- 16 - for device USB 16 Relay
- wifi16-tcp - for device WiFi 16 Relay (using TCP)
- wifi16-udp - for device WiFi 16 Relay (using UDP)
- 8inv2 - for USB 8 DI module
- 8inv2-library - the same like the above command but with expressly stated HID library, for example 8inv2-hidapi, 8inv2-purejavahidapi, 8inv2-hid4java;
NOTE: MCP based devices (4v2, 4r4iov2_abcd, 8inv2) can also be initialized with additionaly specified library - 4v2-hidapi, 4v2-hid4java, 4r4iov2_1111-hidapi, 4r4iov2_0000-purejavahidapi, 8inv2-purejavahidapi...
STATUS command
With this command we retrieve the relays (i/o) status. There are two variants of these commands:
Single relay (i/o) status
FORMAT: java -jar DenkoviRelayCommandLineTool.jar [DEVICE ADDRESS] [DEVICE TYPE] [RELAY or I/O NUMBER] status
The reply is 1 or 0 - for relays (ON or OFF), for i/o (HIGH or LOW level).
Getting Relay1 status of USB 4 Relay v1
java -jar DenkoviRelayCommandLineTool.jar ID=0 4 1 status
1 //Relay1 is ON
Getting In2 status of USB 4 Relay v1. (For this device [RELAY or I/O NUMBER] is from 1 to 8, where 1..4 are Relay1...Relay4 and from 5 to 8 are In1 to In4). We specifiy that the additional 4 i/o lines (FT245R IO.0, IO.2, IO.4 and IO.6 - please take a look here) are working as inputs.
java -jar DenkoviRelayCommandLineTool.jar ID=0 4r4io_0000 6 status
0 //In2 is in low level
Getting Relay4 status of USB 4 Relay v2
java -jar DenkoviRelayCommandLineTool.jar 0001478551 4v2 4 status
1 //Relay1 is ON
Getting In4 status of USB 4 Relay v2. (For this device [RELAY or I/O NUMBER] is from 1 to 8, where 1..4 are Relay1...Relay4 and from 5 to 8 are In1 to In4). Also here we specifiy that the additional 4 i/o lines (MCP2200 GP4, GP5, GP6 and GP7 - please take a look here) are working as inputs. Finally, here we might need to use exactly the hidapi library. So we do:
java -jar DenkoviRelayCommandLineTool.jar 0001478551 4r4iov2_0000-hidapi 8 status
1 //In4 is in high level
For USB 8 Relay, if we wanted to get Relay7 status:
java -jar DenkoviRelayCommandLineTool.jar DAE01hIf 8 7 status
0 //Relay7 is OFF
For USB 16 Relay, if we wanted to get Relay11 status:
java -jar DenkoviRelayCommandLineTool.jar ID=2 16 11 status
0 //Relay11 is OFF
For WiFi 16 Relay, we get Relay3 status using TCP protocol:
java -jar DenkoviRelayCommandLineTool.jar 10.10.100.254:8899 wifi16-tcp 3 status
0 //Relay3 is OFF
or for UDP version it would be:
java -jar DenkoviRelayCommandLineTool.jar 10.10.100.254:8899 wifi16-udp 3 status
0 //Relay3 is OFF
All relays (i/o) status
FORMAT: java -jar DenkoviRelayCommandLineTool.jar [DEVICE ADDRESS] [DEVICE TYPE] all status
The replay consist of 0 or 1 with count depending of the hardware determined by the [DEVICE TYPE]. It is in ascending order. If there the hardware supports i/o (like USB 4 Relay v1, USB 4 Relay v2), firstly they are populated the relays and after them are following the i/o lines.
Getting relays status of USB 4 Relay v1
java -jar DenkoviRelayCommandLineTool.jar ID=0 4 all status
1100 //Relay1 and Relay2 are ON and Relay3 and Relay4 are OFF
Getting relays and i/o status of USB 4 Relay v1. We specify the i/o port to work as 4 inputs:
java -jar DenkoviRelayCommandLineTool.jar ID=0 4r4io_0000 all status
11110000 //Relays are ON, i/o are LOW level
and for i/o interrpreted as outputs it would be:
java -jar DenkoviRelayCommandLineTool.jar ID=0 4r4io_1111 all status
11110000 //Relays are ON, i/o are LOW level
Getting relays status of USB 4 Relay v2
java -jar DenkoviRelayCommandLineTool.jar ID=0 4v2 all status
0000 //all relays are OFF
Getting relays and i/o status of USB 4 Relay v2. We specify the i/o port to work as 4 inputs:
java -jar DenkoviRelayCommandLineTool.jar ID=0 4r4iov2_0000 all status
00001111 //Relays are OFF, i/o are HIGH level
and for i/o interpreted as outputs it would be:
java -jar DenkoviRelayCommandLineTool.jar ID=0 4r4iov2_1111 all status
00001111 //Relays are OFF, i/o are HIGH level
Getting USB 8 Relay relays status
java -jar DenkoviRelayCommandLineTool.jar ID=0 8 all status
00000000 //all relays are OFF
Getting USB 16 Relay relays status
java -jar DenkoviRelayCommandLineTool.jar ID=0 16 all status
0000000011111111 //relays 1..8 are OFF, 9..16 are ON
For WiFi 16 Relay, we do:
java -jar DenkoviRelayCommandLineTool.jar 10.10.100.254:8899 wifi16-tcp all status
0000000011111111 //relays 1..8 are OFF, 9..16 are ON
Setting relays (i/o) commands
The command changes state of single or all relays (i/o).
The reply of these commands is the same like this one from the STATUS for all relays (i/o) command.
Single relay (i/o) setting
This command sets only the specify relay (i/o) without changing the rest.
FORMAT: java -jar DenkoviRelayCommandLineTool.jar [DEVICE ADDRESS] [DEVICE TYPE] [RELAY or I/O NUMBER] [{0,1}]
Setting Relay1 in ON of USB 4 Relay v1
java -jar DenkoviRelayCommandLineTool.jar ID=0 4 1 1
1000
Setting i/o (In1) in LOW level of USB 4 Relay v1. Here we need to specify the i/o to be outputs
java -jar DenkoviRelayCommandLineTool.jar ID=0 4r4io_1111 5 0
11110111
Setting Relay4 in OFF of USB 4 Relay v2
java -jar DenkoviRelayCommandLineTool.jar ID=0 4v2 4 0
1110
Setting i/o (In2) in HIGH level of USB 4 Relay v2. Here we need to specify the i/o to be outputs
java -jar DenkoviRelayCommandLineTool.jar ID=0 4r4io_1111 6 1
00000100
Setting Relay3 in OFF of USB 8 Relay
java -jar DenkoviRelayCommandLineTool.jar ID=0 8 3 0
11011111
Setting Relay1 in OFF of USB 16 Relay
java -jar DenkoviRelayCommandLineTool.jar ID=0 16 1 0
0111111111111111
For WiFi 16 Relay, we set Relay2 in OFF in this way:
java -jar DenkoviRelayCommandLineTool.jar 10.10.100.254:8899 wifi16-udp 2 0
1011111111111111
Setting all relays (i/o) in ON(HIGH) / OFF(LOW)
This command acts like the above command but instead of only one relay (i/o) it sets all the relays (i/o) in same state - ON (HIGH) or OFF (LOW).
FORMAT: java -jar DenkoviRelayCommandLineTool.jar [DEVICE ADDRESS] [DEVICE TYPE] all [{0,1}]
For example:
java -jar DenkoviRelayCommandLineTool.jar ID=0 8 all 1
11111111
or
java -jar DenkoviRelayCommandLineTool.jar ID=0 4 all 0
0000
Setting all relays (i/o) with TURN command
This command sets all the relays (i/o) at the same time with the specified states
FORMAT: java -jar DenkoviRelayCommandLineTool.jar [DEVICE ADDRESS] [DEVICE TYPE] turn [{0,1}n]
Setting all USB 4 Relay v1 relays in ON
java -jar DenkoviRelayCommandLineTool.jar ID=0 4 turn 1111
1111
Setting all USB 4 Relay v1 relays in OFF and all i/o in HIGH level. Here we state the i/o to be outputs as well:
java -jar DenkoviRelayCommandLineTool.jar ID=0 4r4io_1111 turn 00001111
00001111
Setting all USB 4 Relay v2 relays in OFF
java -jar DenkoviRelayCommandLineTool.jar ID=0 4v2 turn 0000
0000
Setting all USB 4 Relay v2 relays in ON and all i/o in LOW level. Here we state the i/o to be outputs as well:
java -jar DenkoviRelayCommandLineTool.jar ID=0 4r4iov2_1111 turn 11110000
11110000
Setting Relay1..Relay4 in OFF and Relay5..Relay8 in ON of USB 8 Relay
java -jar DenkoviRelayCommandLineTool.jar ID=0 8 turn 00001111
00001111
Setting all relays but Relay1 in ON of USB 16 Relay
java -jar DenkoviRelayCommandLineTool.jar ID=0 16 turn 0111111111111111
0111111111111111
Setting odd relays in ON of WiFi 16 Relay
java -jar DenkoviRelayCommandLineTool.jar ID=0 wifi16-tcp turn 1010101010101010
1010101010101010
TEMPERATURE command
Get the temperature value (only if the relay board support temperature sensors - for example USB 4 Relay with TCN75A)
FORMAT: java -jar DenkoviRelayCommandLineTool.jar [DEVICE ADDRESS] [DEVICE TYPE] temp [{C,F}]
Getting temperature in Celsius:
java -jar DenkoviRelayCommandLineTool.jar DAE0006K 4 temp C
29.5C
Getting temperature in Fahrenheit:
java -jar DenkoviRelayCommandLineTool.jar DAE0006K 4 temp F
85.0F
TIMER command
Exectues time-critical operations. Well known fact is that every time when we run the command line tool the jvm is runned and this takes significant time. Many users contacted us with requests to execute timer commands for time-critical operations. That's why we added such command. It can perform single pulse, many pulses and even cycles with more complex sequences of pulses and every pulse can be with different time (in miliseconds).
FORMAT: java -jar DenkoviRelayCommandLineTool.jar [DEVICE ADDRESS] [DEVICE TYPE] timer [n_cycles,{state1,time1}n]
Please note: The state bits must be set according to the [DEVICE TYPE]!
Expected reply: current cycle and relays statuses during every switching
Example for setting all relays ON for 10ms, all OFF for 50ms and all ON for 25ms for device USB 4 Relay v1:
java -jar DenkoviRelayCommandLineTool.jar id=1 4 timer 1,1111,10,0000,50,1111,25
Cycle 1/1
1111
0000
1111
1111
0000
1111
The below example makes all relays ON for 10ms and all OFF for 100ms - 5 times for device USB 8 Relay:
java -jar DenkoviRelayCommandLineTool.jar id=1 8 timer 5,11111111,10,00000000,100
Cycle 1/5
11111111
00000000
Cycle 2/5
11111111
00000000
Cycle 3/5
11111111
00000000
Cycle 4/5
11111111
00000000
Cycle 5/5
11111111
00000000
11111111
00000000
Cycle 2/5
11111111
00000000
Cycle 3/5
11111111
00000000
Cycle 4/5
11111111
00000000
Cycle 5/5
11111111
00000000
The below example makes first relay ON for 10ms and OFF for 1sec - 5 times for device USB 16 Relay:
java -jar DenkoviRelayCommandLineTool.jar id=1 16 timer 5,1000000000000000,10,0000000000000000,1000
Cycle 1/5
1000000000000000
0000000000000000
Cycle 2/5
1000000000000000
0000000000000000
Cycle 3/5
1000000000000000
0000000000000000
Cycle 4/5
1000000000000000
0000000000000000
Cycle 5/5
1000000000000000
0000000000000000
1000000000000000
0000000000000000
Cycle 2/5
1000000000000000
0000000000000000
Cycle 3/5
1000000000000000
0000000000000000
Cycle 4/5
1000000000000000
0000000000000000
Cycle 5/5
1000000000000000
0000000000000000
Typical applications
Run it from the command promt
The commands are the same for Windows / Linux / Raspbian / macOS.
Create shortcuts
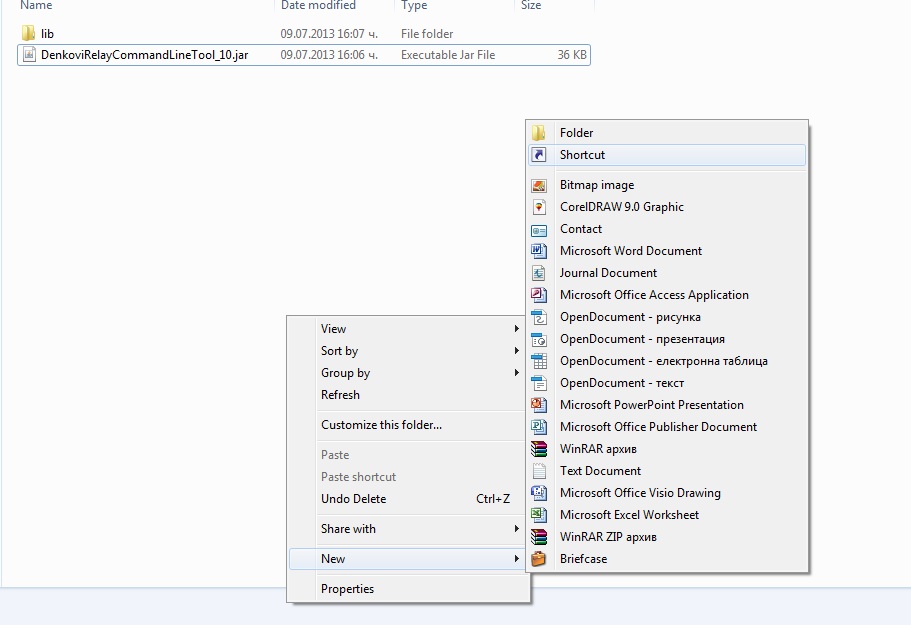
Now type
java -jar "path/to/the/jar/file" and the command in our case which is "DAE0007l 16 all 1"
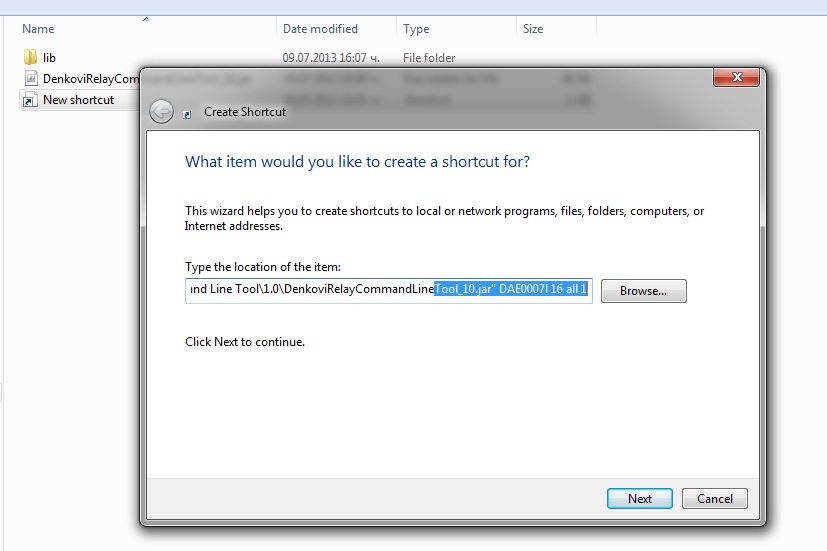
Name it "ALL ON". When you click it if all the settings are correct, the relays should be all ON.
Now, you can create the same way ALL OFF command or whatever shortcut you need.
BAT / BASH files
Very often for many applications it is required some relay to be turned on, wait several seconds and then off. This is so called timer function. With our command line tool this can be done in several easy steps in Windows:
- Create new text file and save it as .BAT file. For example "Pulse5.BAT".
- Open the file and type the following commands (USB 16, work with relay 1) and save it.
- java -jar DenkoviRelayCommandLineTool.jar DAE00000 16 1 1
- PING 1.1.1.1 -n 1 -w 5000 >NUL
- java -jar DenkoviRelayCommandLineTool.jar DAE00000 16 1 0
- Now you can just click it. Relay 1 will be turned ON for 5 seconds and then will be turned OFF.
It is the same story for Linux:
- Create new text file and save it as .VIM file. For example "Pulse5.VIM".
- Open the file and type the following commands (USB 16, work with relay 1) and save it.
- #!/bin/bash
- java -jar DenkoviRelayCommandLineTool.jar DAE00000 16 1 1
- sleep 5
- java -jar DenkoviRelayCommandLineTool.jar DAE00000 16 1 0
- Now you can just click it. Relay 1 will be turned ON for 5 seconds and then will be turned OFF.
PHP
Just use the function shell_exec() :
<?php
$output = shell_exec('java -jar DenkoviRelayCommandLineTool.jar DAE00000 16 1 0');
?>
Bellow it is shown video how it is possible to acess USB 4 relay board from Android tablet


