Cart is empty.
.png)


This tutorial is about how to access Denkovi DAEnetIP3-Wx and DAEnetIP3-Ex (and all the devices based of them) via RS232 commands with VSP.
- For which devices is this tutorial
- Considerations and requirements
- Little theory
- Step 1: Create VSP on Windows
- Step 2: Adjust the DAEnetIP3 controller settings
- Step 3: Control it from .NET VB 2010 Express demo software
For which devices is this tutorial
This tutorial is referred to all devices based on DAEnetIP3 controller.
|
Order code
|
Device name and link
|
| DAEnetIP3 - Ex | Ethernet DAQ TCP/IP controller - 32 I/O |
| DAEnetIP3 - Wx | Wi-Fi 802.11 b/g DAQ TCP/IP controller - 32 I/O |
| DAE-RB/Ro8-12V + DAEnetIP3-ET | TCP/IP, Web and Telnet Eight Channel Relay Board |
| DAE-RB/Ro8-12V + DAEnetIP3-WT | Wi-Fi IEEE 802.11 b/g eight channel relay board |
| DAE-PB-RO12/DI8/AI8 + DAEnetIP3-EB | Ethernet TCP/IP Data Acquisition I/O Module |
| DAE-PB-RO12/DI8/AI8 + DAEnetIP3-WB | Wi-Fi IEEE 802.11 b/g Data Acqusition I/O Module |
Considerations and requirements
- This tutorial only explains how to create VSP and how to use the open source VB example with one of the listed devices
- This tutorial is only for Windows
- You should be familiar with the particular DAEnetIP3 based device
- Basic programing knowledge in RS232 Serial Programming is requred
- Basic .NET (VB 2010 Express) knowledge is also required
- We assume also that you have already managed to connect to your device and worked with it.
Serial Port (RS232) programming is widely used method for communication between PC and some device. It is easy to be created such software in different languages and platforms. When we (Denkovi Team) developed DAEnetIP3 we decided that it must support VSP (besides the other ways of communication) because:
- Serial RS232 communication is easy to be understood
- Minimal programing knowledge is required to be created powerful software for DAEnetIP3
- There is no need of learining some network protocol and searching for library for it
- In most cases the programming environment does not require extra library
- The commands that must be sent are the same (just like Telnet or TCP/IP communication ways for DAEnetIP3)
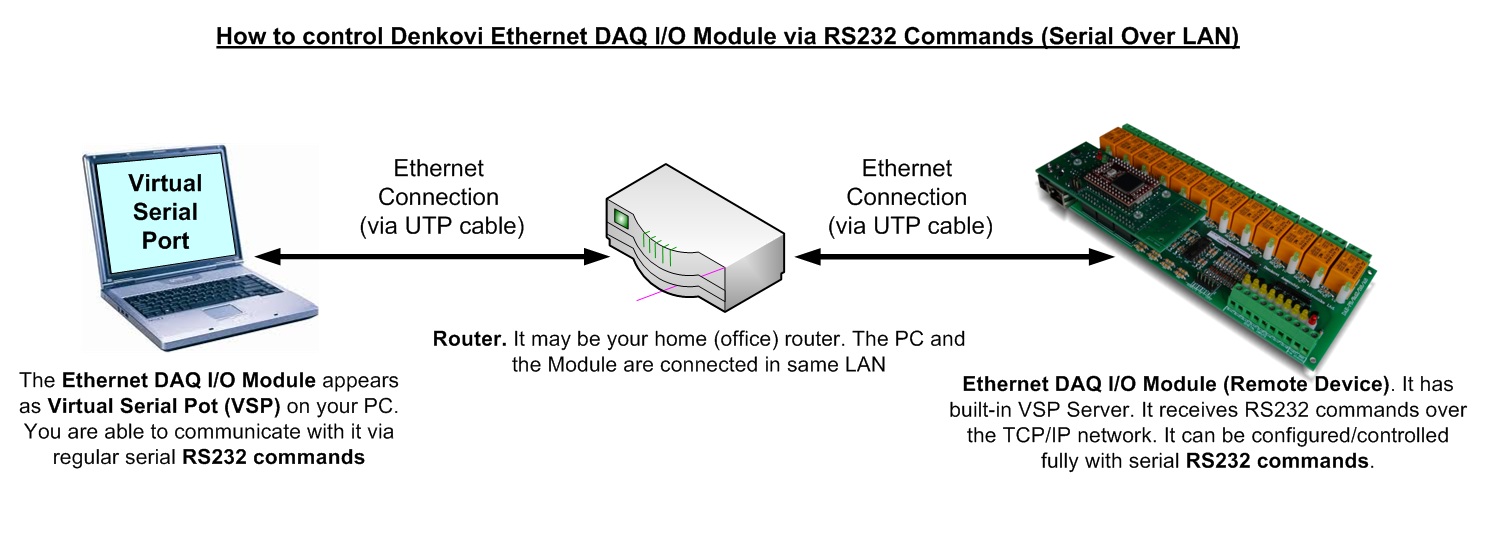
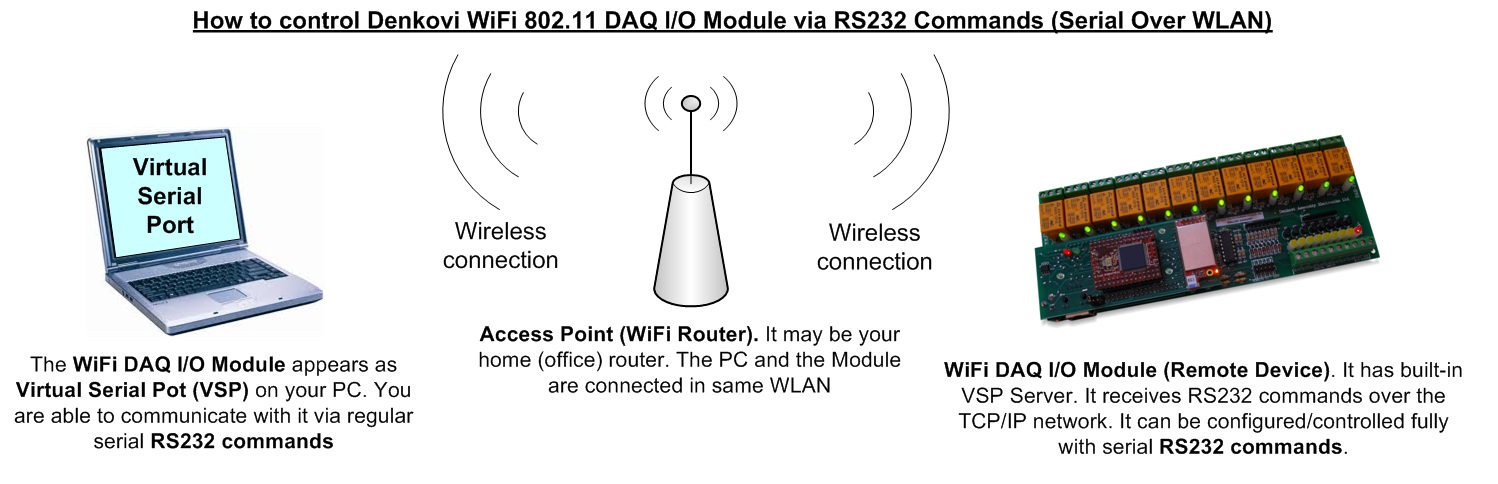
Generally there is no difference if you will access the DAEnetIP3 based device via wired Ethernet network or Wireless. There are only 3 basic things that you need to set:
- COM Port Number
- Remote Device IP
- Remote Device Port
Bellow are shown for example two images - Ethernet and Wi-Fi DAQ I/O Module controlled via VSP.
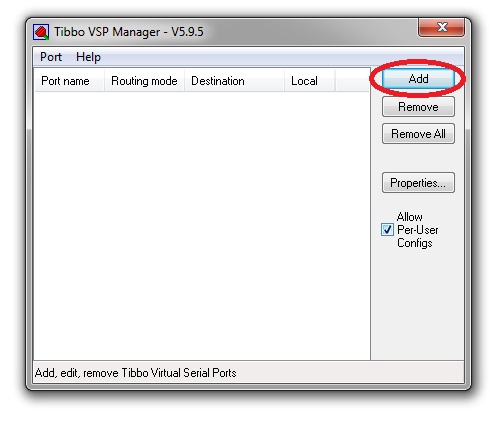
- First you will need to download and install this Windows application. With this tool you will be able to create and configure Virtual Serial Ports on your PC.
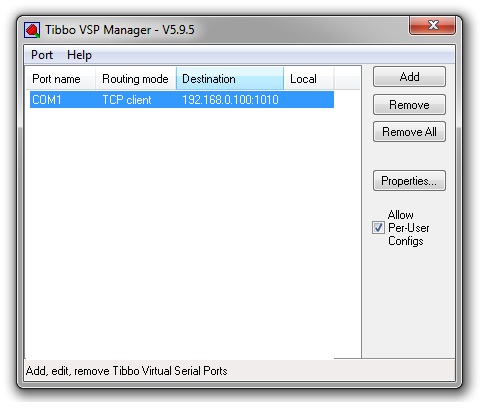
- When you start the application you will have to create your Virtual Serial Port that will be used in your project. So when you start the software you should see the window bellow. Click Add button:
- After that you will have to adjust the VSP settings. The VSP name is COM1. IP address is your DAEnetIP3 device IP address (in this case it is the default 192.168.0.100). We chose port to be 1010 but may be any free of your network.
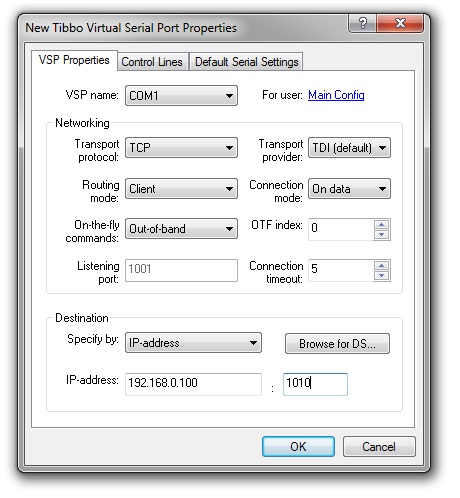
- When you are sure for all settings just create the VSP.
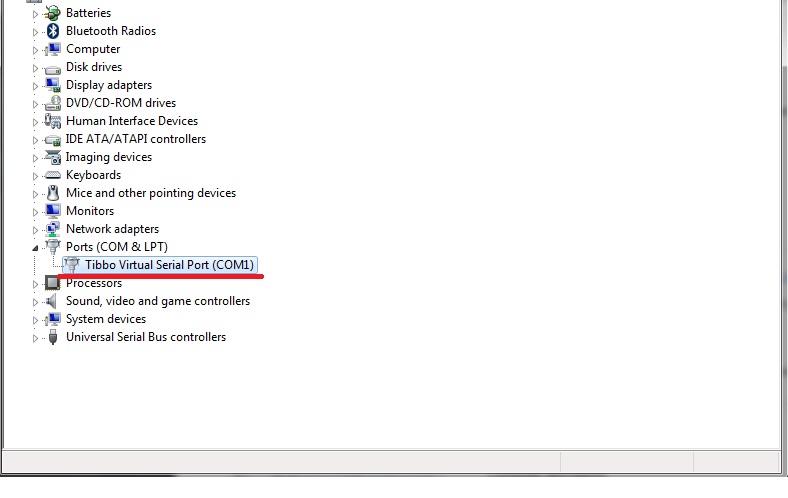
- The Virtual Serial Port now is created. You may see it in the Device Manager.
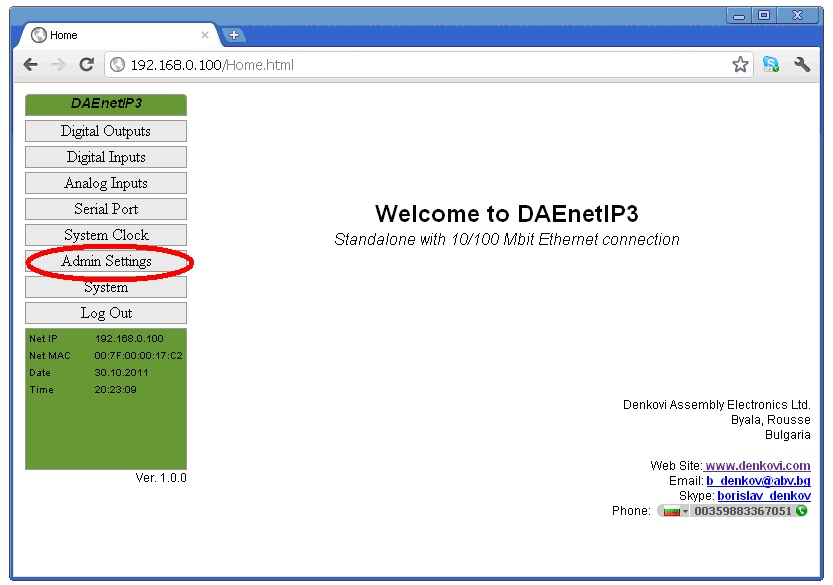
Step 2: Adjust the DAEnetIP3 controller settings
- Now you will have to adjust the network parameters of DAEnetIP3.
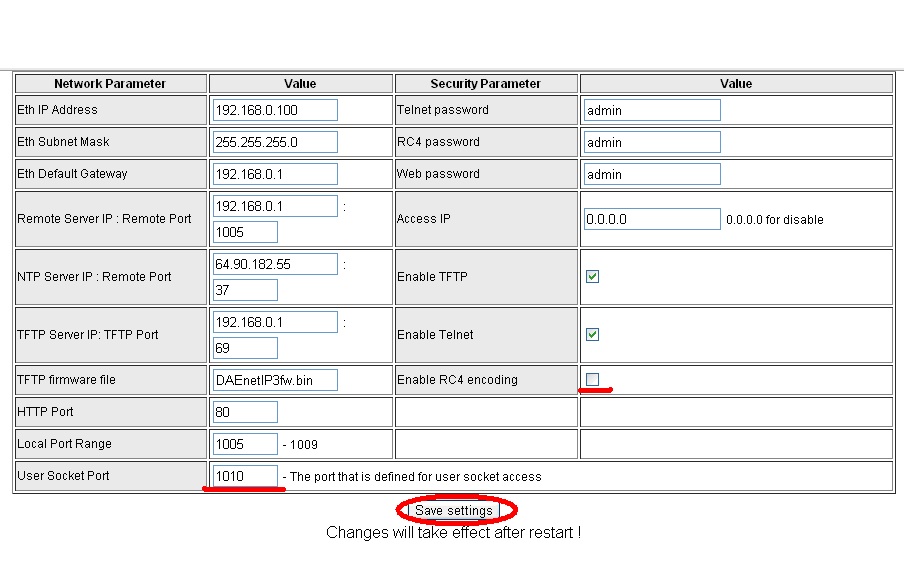
The User Socket Port must be the same like in the VSP Manager. Also be sure RC4 encoding is turned OFF. Otherwise the controller will accept only RC4 encrypted messages, which is not object of this tutorial. Click Save and restart the controller so the changes to be saved.
Step 3: Control it from .NET VB 2010 Express demo software
- Now your DAEnetIP3 device may be controlled by any software that may send and receive serial RS232 commands. Our team provided such demo application in one of the most popular languages - Visual Basic. The example is with open source and it is build with Microsoft .NET Visual Basic Express 2010. The application window is shown bellow:
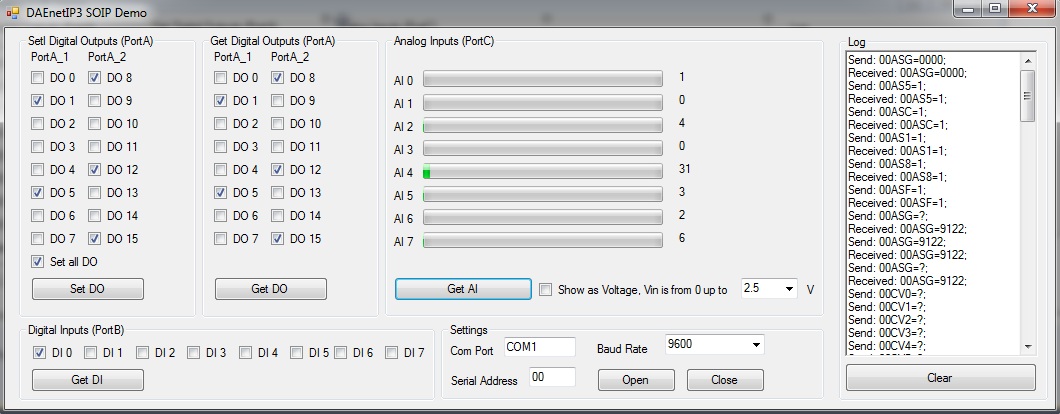
- To open COM 1 just click button Open and try the I/O ports.
- The communication is based on Microsoft Serial Port control

- For download (full project) please use this link - SOIP .NET VB Express Demo for DAEnetIP3


