Cart is empty.
.png)


Node-RED is a programming tool for connecting different devices, APIs and online services in interesting way which can run on WIndows, Linux, MAC and even Rasberry PI. Combining the power of Javascript and user-friendly interface Node-RED is an easy way to start a project without knowledge in low level of protocols such as SNMP, HTTP, MQTT, etc. Here you will find some information how to run Denkovi modules together with Node-RED. More information about Node-RED - https://nodered.org/
Node-RED Installation
To install Node-RED first Node.js must be installed. Download package for Node.js could be found on this page: https://nodejs.org/en/download/
After downloading and installing Node.js just a short command in Node.js command prompt will install Node-RED (for Windows users only): npm install -g --unsafe-perm node-red
More information about installation for different platforms is given here.
Once installed Node-RED will be accessed from browser on 127.0.0.1:1880 (by default).
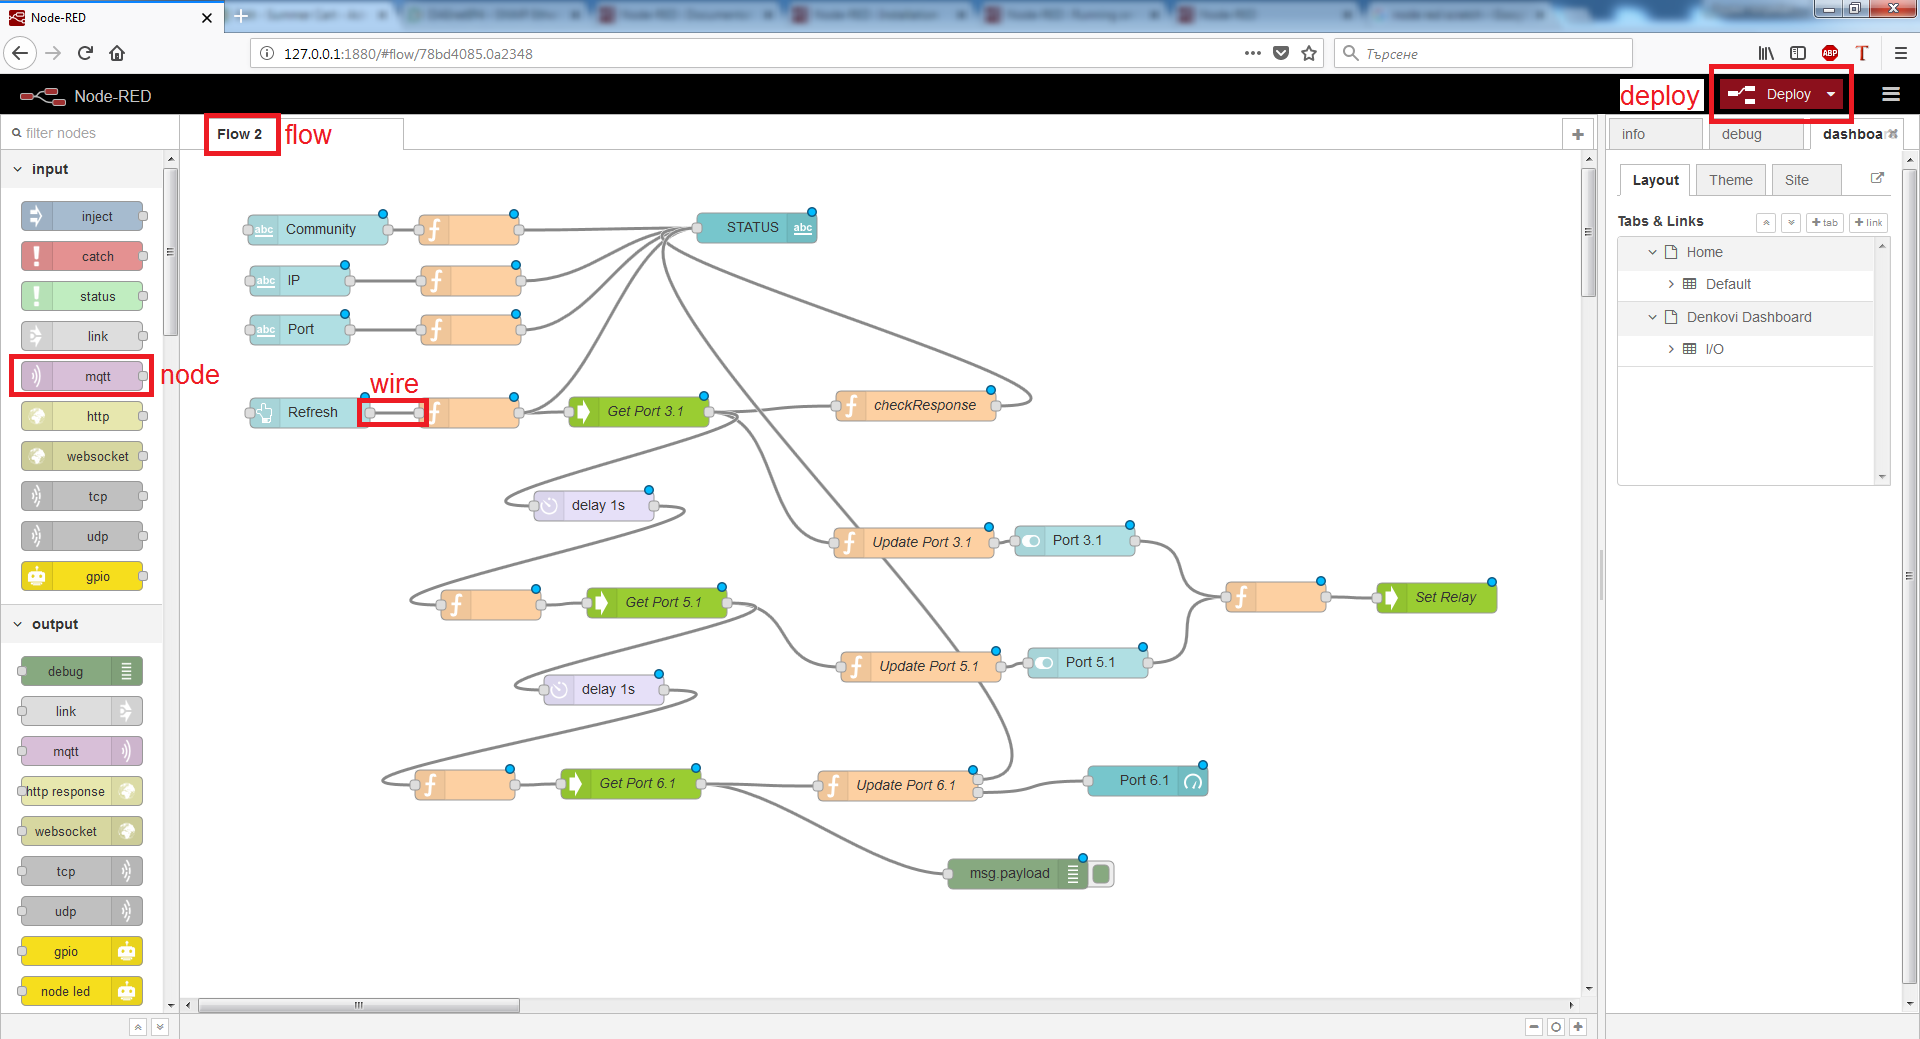
Just drag and drop nodes, wire connections, create flows and deploy.
Node-RED Programming Information
The idea of Node-RED programming is to be easier to program for even people that do not know programming. A basic knowledge in javascript is recommended to start programming. Node-RED has nodes which are blocks doing something - functions, inputs, outputs, etc. There are also flows which are just as sheets and make programs more readable. All flows are part of one program but may have different tasks. Palletes are a set of programming "functions" or libraries as called in programming languages, which make easier developing applications with different protocols communication. They are easily installed and are ready to use after that. After wiring nodes from different palletes in all flows it is time to build the program. This is done by clicking "Deploy" button.
Node-RED Installing Palletes
Installing palletes is an easy task. just go to upper right corner and click Settings->Palletes->Install tab and search for pallete. When found needed pallete click install and that's all. The pallete's nodes will be found at left bar in Node-RED.

Import programs in Node-RED
To import program in Node-RED first copy in clipboard the desired program from text file, then go to upper right corner, click Import->Clipboard and paste the text in appeared window.

About Denkovi Software Examples
All our products that supports communication through Node-RED have download link to an example in section Software Examples.
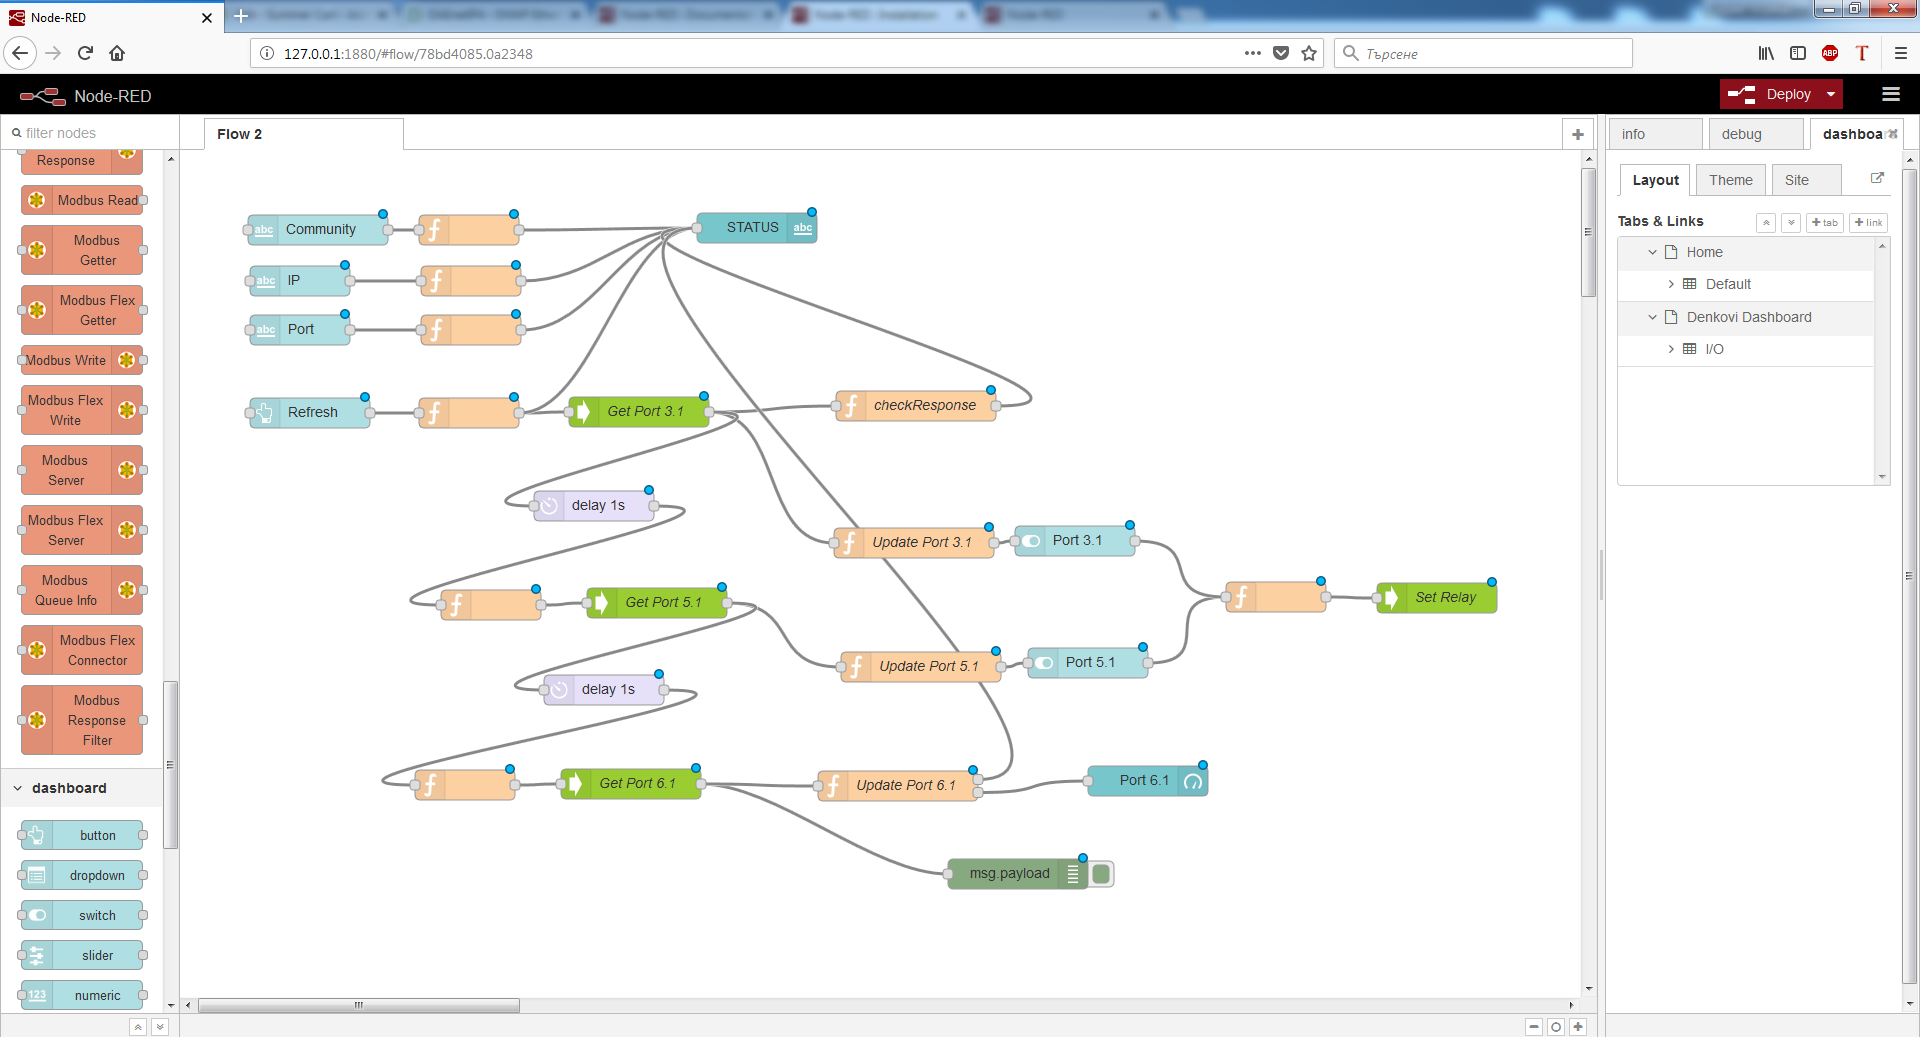
All examples provided use dashboard plugin. Additional palletes might be needed for different examples. An example screenshot of SmartDEN IP-32IN is given below.

Please note:
- Due to the specific of the communication (HTTP GET requests), it is strongly recommend to log-out from the denkovi hardware device web server when working with Node-RED because either the communication will not be established either the user will be logged-of automatically every time when a request come from Node-RED server.
- Before start the Node-RED, please be sure the HTTP / XML / JSON settings are done properly, as the image below:
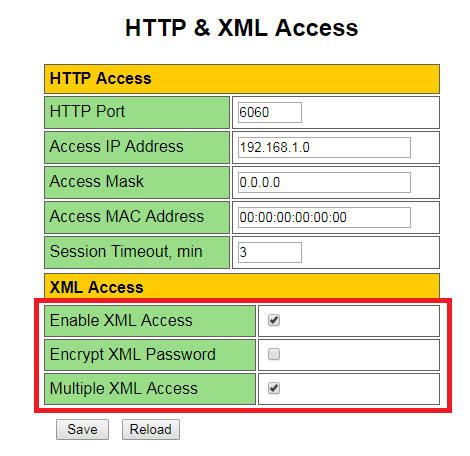
Specificly, please be sure the parameters Enable XML Access and Multiple XML Access are enabled and Encrypt XML Password is disabled.


