Cart is empty.
.png)
.png)


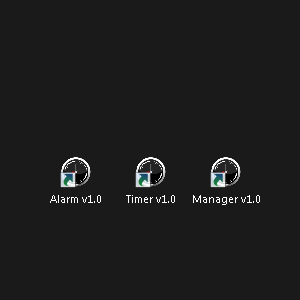
Denkovi JExtraPack is packet from 3 applications for our device - USB Eight Channel Relay Board. The set consist of Timer, Manager, Alarm application.
Please note this software is not anymore supported, it is replaced now by DRM Software v3
|
|

- General overview
- Who can use Denkovi JExtraPack
- List with currently supported relay boards
- Current version download
- Denkovi JExtraPack system requirements
- Denkovi JExtraPack installation guide for Windows
- Manager
- Timer
- Alarm
Denkovi JExtraPack contains 3 applications. Each of these applications are written in Java, so JVM is required. Each application can control up to 10 USB relay boards so you will need of course FTDI VCP drivers. We provide single installation file and everithing is included in it.
Who can use Denkovi JExtraPack
Denkovi JExtraPack may be used by anyone who has at least one of Denkovi USB Eight Channel relay boards from the current version supported list.
List with currently supported USB Eight Channel Relay Boards
|
Order number
|
Relay board name and link
|
| DAE-CB/Ro8/12V-USB | USB Eight Channel Relay Board for Automation |
|
Version
|
Release date
|
Download links
|
| 1.1 | 06.04.2012 | |
| 1.0 | 09.2009 |
For Version history, please download this file
Denkovi JExtraPack system requirements
Operating systems: Windows XP, Windows Vista, Windows 7
Java Virtual Machine: Yes. The last version is included from the release date in the installation setup file
FTDI drivers: Yes. They are included in the installation setup file
Denkovi JExtraPack installation guide for Windows
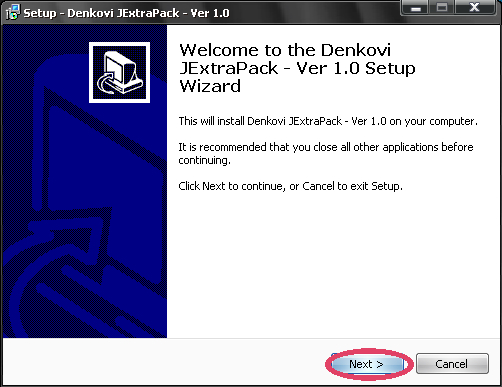
To get installed Denkovi JExtraPack on your PC the only thing you need to do is to download and run the installation file DenkoviJExtraPack.exe. The whole installation takes several minutes. Here are the steps you should go through the installation:
1) Download DenkoviJExtraPack.exe and run it.
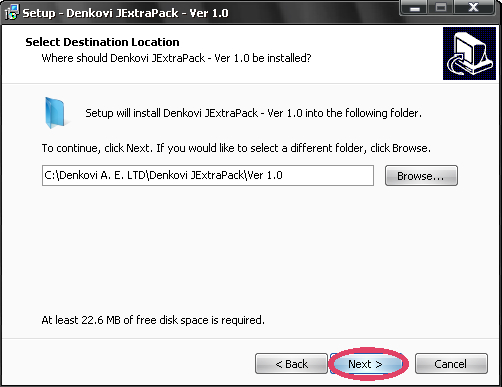
2) Select the place you would like to be installed Denkovi JExtraPack. It is recommend to install it on drive that is different from C:\
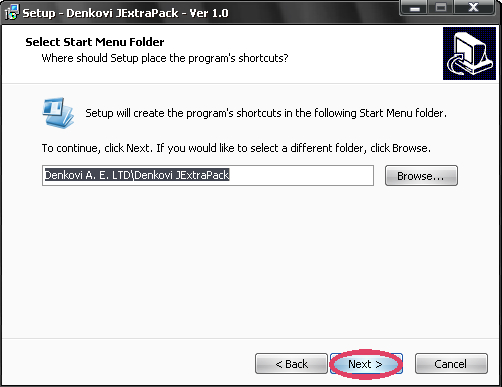
3) Setup will create icons on your start menu.
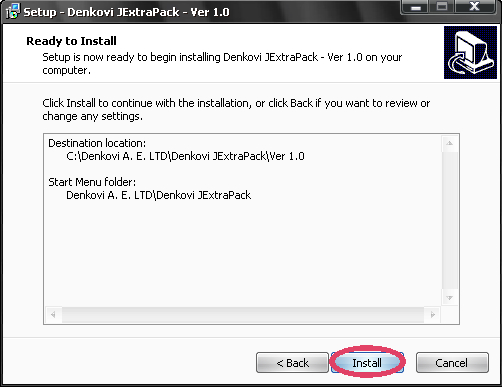
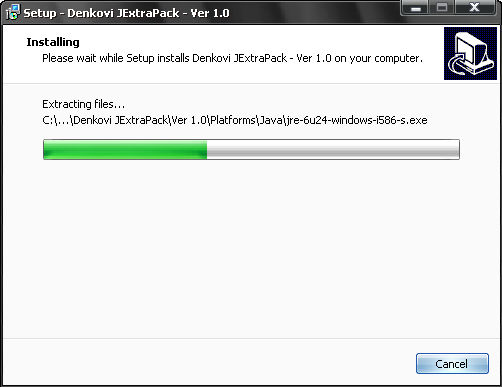
4) Install.
5) Installation progress.
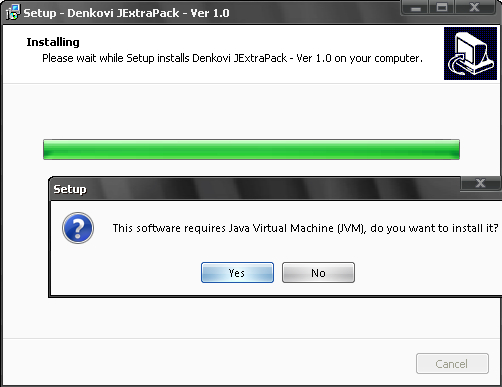
6) You will be asked if you have JVM (Java Virtual Machine). If your PC does not have any JVM installed, you need to click "Yes" and follow the steps that JVM installation window will guide throug. If you have already JVM click "No". If you have already JVM and click "Yes" to install it - don't worry. Nothing will be wrong, just will take several more minutes to update your JVM to the latest version.
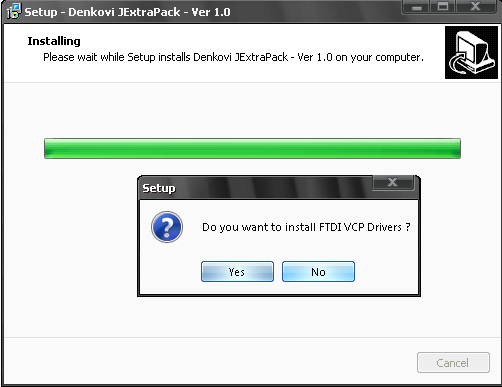
7) You will be asked if you have all the necessary drivers installed. If you hve already FTDI VCP drivers on your PC, skip this step. Otherwise click "Yes".
8) Finish the installation.
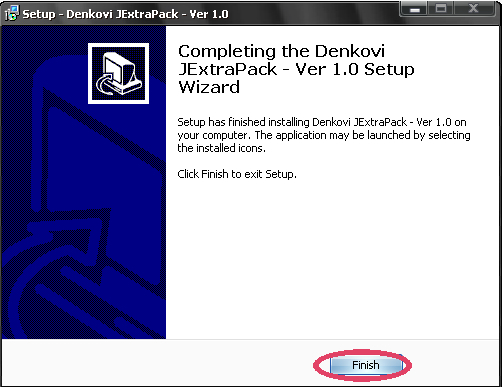
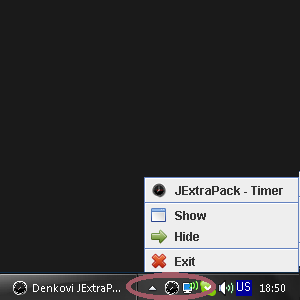
9) You may find the Denkovi JExtraPack icons on your desktop. Also there will be a try icon for show/hide Denkovi JExtraPack application when start it.
Manager
This is manager that allows simple and easily toggling the relays. It contains eight relay toggle buttons and two for all on/off. The application can handle up to 10 USB Relay Boards at a time. The main advantage is that you can select which board to control and toggle the exact relay. On the first image right to the text it is shown how sholuld look like the normal running application.
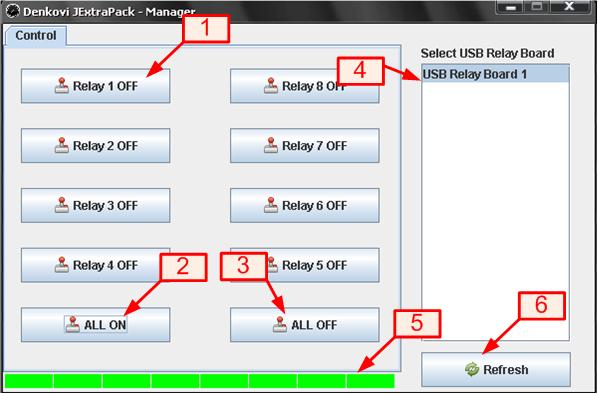
1) Button ON/OFF. Switch ON/OFF relay 1.
2) 'ALL ON' button. Switch ON all the relays.
3) 'ALL OFF' button. Switch OFF all the relays.
4) Relay boards list. List with all available relay boards.
5) Relay status indicators. If some indicator is green, then the relay is ON.
6) 'Refresh' button. It updates the list with relay boards.
[back to top]
This is windows application for switching on/off up to 10 relay boards with your PC. You can give different states, sequences and delays for each relay and each connected board on your PC. You can save your algorithm in file and load it.
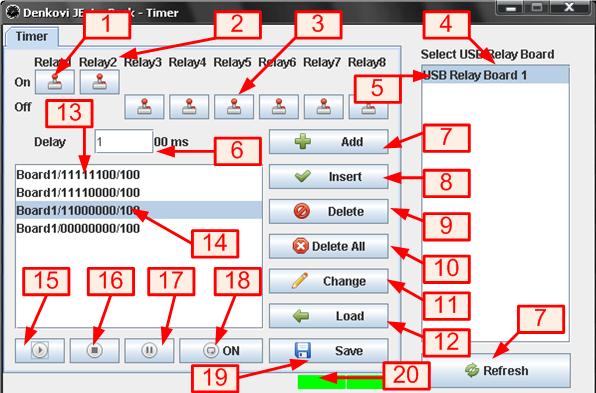
1) Timer relay button 'ON'. When some timer relay button is in this position the given relay state is ON. If this button is clicked once the state will become OFF.
2) Relay number. Shows the relay number: 1..8
3) Timer relay button 'OFF'. When some timer relay button is in this position the given relay state is OFF. If this button is clicked once the state will become ON.
4) Relay boards list. List with all available relay boards.
5) Selected relay board. The selected relay board that the application will control.
6) Delay field. This is how many ms will be delayed each state. For example if this field is 5, the time will be 5x100ms = 500ms.
7) Timer button 'Add'. This button adds new state in the timer playlist.
8) Timer button 'Insert'. This button inserts new state in the timer playlist. The new state is inserted after the selected state.
9) Timer button 'Delete'. This button deletes the currently selected state from the timer playlist.
10) Timer button 'Delete all'. This button deletes all the states from the timer playlist.
11) Timer button 'Change'. This button changes the currenty selected state from the timer playlist.
12) Timer button 'Load'. Load the timer playlist from file.
13) Timer playlist. It represent playlist with all relay states and their delays. The software goes through its states sequentialy until the playlist end is reached or go back to the beginning (if repeat is on).
14) Selcted state. This is the current state. When some state is selected from the timer playlist, its state is displayed by the timer relay buttons and its delay is shown in Delay field.
15) Timer button 'Play'. This button starts playing the timer playlist. Note that there must be at least one state in the timer list to be played.
16) Timer button 'Stop'. This button stops playing the timer playlist.
17) Timer button 'Pause'. This button pause playing the timer playlist.
18) Timer button 'Rpt on/off'. This button enable/disable repeating the timer playlist.
19) Timer button 'Save'. Save the current playlist to file.
20) Relay status indicators. If some indicator is green, then the relay is ON.
21) Timer button 'Refresh'. It updates the list with relay boards.
[back to top]
Alarm
This mode is for making weekly schedule. The user may set each day form the week ON and OFF turning time for each relay.
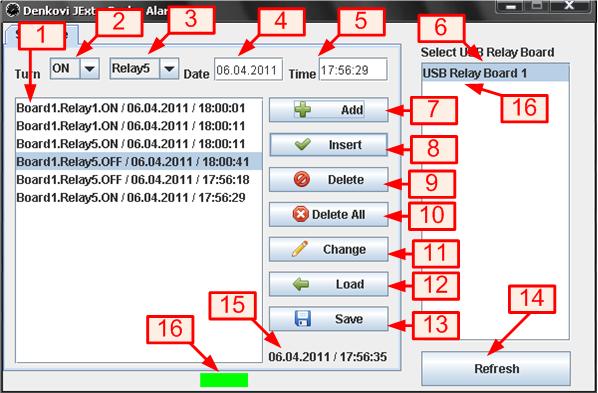
1) Alarm events playlist. It represent playlist with all events.
2) Relay state combo box. This combo box contains two possible relay states - ON and OFF.
3) Relay number combo box. This combo box contains all the relays that may be set in the event.
4) Date field. The date when the relay will be switched. It is with format - dd.mm.yyyy, see 15)
5) Time field. The time when the relay will be switched. It is with format - hh.mm.ss, see 15)
6) Relay boards list. List with all available relay boards
7) Alarm button 'Add'. This button adds new event in the alarm playlist.
8) Alarm button 'Insert'. This button inserts new event in the alarm playlist. The new state is inserted after the selected state.
9) Alarm button 'Delete'. This button deletes the currently selected event from the alarm playlist.
10) Alarm button 'Delete all'. This button deletes all the events from the alarm playlist.
11) Alarm button 'Change'. This button changes the currenty selected event from the alarm playlist.
12) Alarm button 'Load'. Load the alarm event playlist from file.
13) Alarm button 'Save'. Save the current alarm event playlist to file.
14) Alarm button 'Refresh'. It updates the list with relay boards.
15) Current date/time.
16) Relay status indicators. If some indicator is green, then the relay is ON.


